
Hey there, cookie lovers! If you’re looking for a delicious treat that’s super easy to whip up, you’ve got to try my Air-Fryer Chocolate Chip Cookie Cups. Seriously, these little gems are a game changer! They’re perfectly crispy on the outside and soft and gooey on the inside, just how I love my cookies. Plus, they come together in no time, making them the ultimate quick dessert for any occasion.
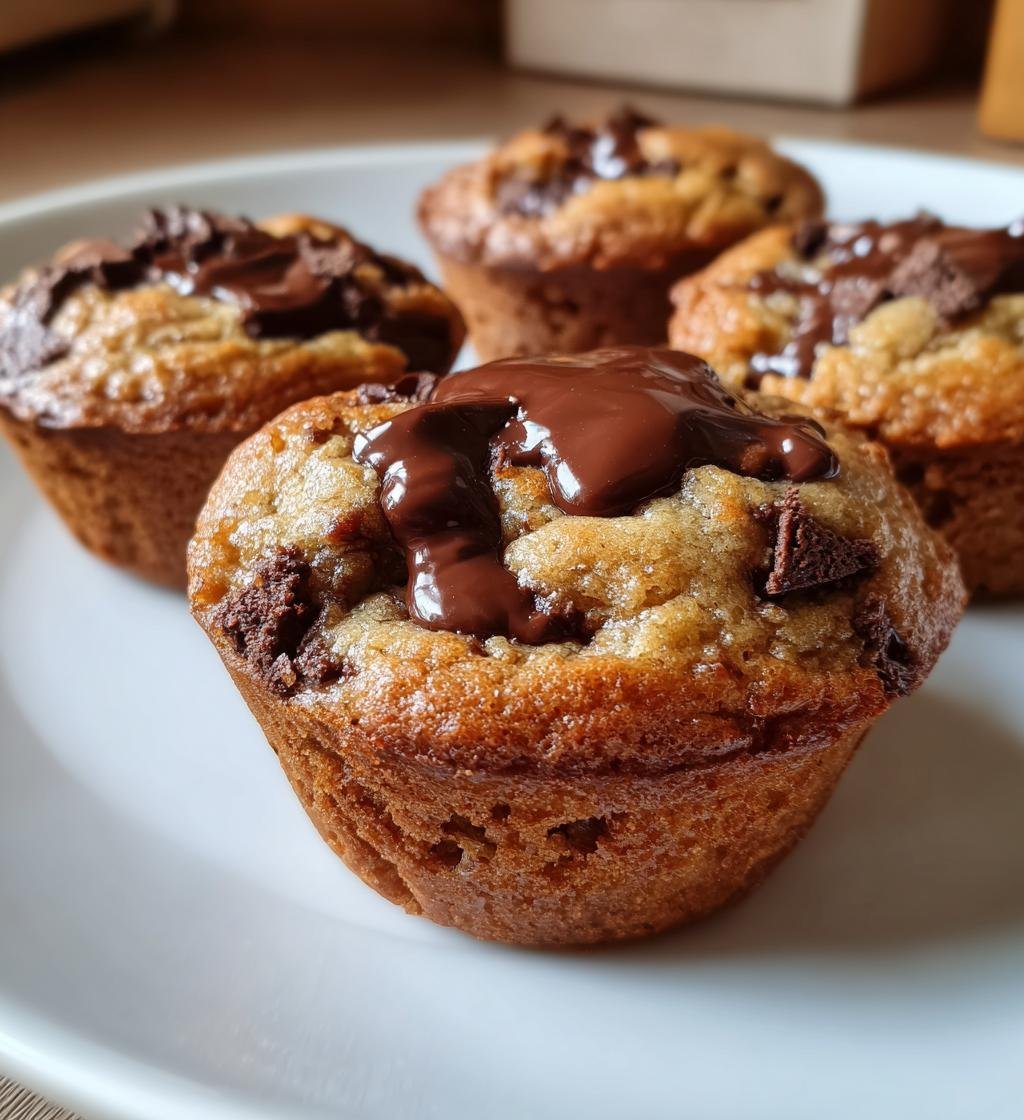
What I adore about these cookie cups is that they’re not only a breeze to make but also pack that classic chocolate chip flavor we all crave. You can throw them together in about 15 minutes, and before you know it, the sweet aroma of baking cookies fills your kitchen. Trust me, your family will be begging for seconds, and you’ll love how little mess there is to clean up afterward!
So, let’s dive right into this scrumptious recipe that’s bound to be a hit! Get your apron on, and let’s make some Air-Fryer Chocolate Chip Cookie Cups that will leave everyone asking for your secret!
Ingredients List
Here’s what you’ll need to make these delightful Air-Fryer Chocolate Chip Cookie Cups. Each ingredient plays a vital role in creating that perfect blend of flavors and textures, so let’s get into it!
- 1 cup all-purpose flour: This is the base of our cookie cups, giving them structure and chewiness. Make sure to spoon and level it off for accuracy!
- 1/2 teaspoon baking soda: This little leavening agent helps our cookie cups rise a bit, making them soft and fluffy.
- 1/4 teaspoon salt: Just a pinch! Salt enhances all the sweet flavors and balances the taste perfectly.
- 1/2 cup unsalted butter, softened: Butter is the heart of these cookie cups. Let it sit out at room temperature to get nice and soft before you start mixing.
- 1/2 cup brown sugar: This adds that lovely caramel flavor and moisture. The darker the sugar, the richer the taste!
- 1/4 cup granulated sugar: A bit of white sugar helps the cookies spread and adds sweetness. You can adjust this if you prefer them sweeter!
- 1 teaspoon vanilla extract: Trust me, this is a must! It brings a warm, inviting flavor to the cookies.
- 1 large egg: Eggs provide moisture and help bind everything together for that perfect cookie cup texture.
- 1 cup chocolate chips: The star of the show! Use your favorite type—milk, dark, or even white chocolate—whatever tickles your taste buds!
Gather these ingredients, and you’ll be well on your way to cookie cup heaven!
How to Prepare Air-Fryer Chocolate Chip Cookie Cups
Alright, let’s get cooking! Making these Air-Fryer Chocolate Chip Cookie Cups is a straightforward process that will have you enjoying warm, gooey cookies in no time. Just follow these steps, and you’ll be set!
Step-by-Step Instructions
- Preheat your air fryer: Start by preheating your air fryer to 320°F (160°C). This step is crucial because it ensures your cookie cups cook evenly and come out perfectly golden.
- Mix the dry ingredients: In a medium bowl, whisk together the all-purpose flour, baking soda, and salt. This helps to incorporate everything evenly and avoids any clumps.
- Cream the butter and sugars: In another large bowl, cream the softened unsalted butter, brown sugar, and granulated sugar together. Use a hand mixer or a sturdy wooden spoon for about 2-3 minutes until the mixture is light and fluffy. This step is important because it adds air to your cookie cups, making them nice and soft!
- Add the wet ingredients: Next, mix in the vanilla extract and the large egg to your butter and sugar mix. Blend until everything is fully combined. You want it to look smooth and creamy—don’t worry if it seems a bit runny; that’s perfectly normal!
- Combine dry and wet ingredients: Gradually add the dry mixture into the wet one. I like to do this in two or three additions, mixing gently until just combined. You don’t want to overmix, or your cookie cups will be tough!
- Fold in the chocolate chips: Now comes the best part! Gently fold in the chocolate chips with a spatula or wooden spoon until they’re evenly distributed. You want those gooey morsels in every bite!
- Scoop into silicone cups: Grab your silicone cups or muffin liners and scoop the dough evenly into them, filling each cup about 2/3 full. This gives them room to rise without overflowing.
- Air fry the cookie cups: Place the filled cups in the air fryer basket, making sure they’re not touching each other for proper air circulation. Cook them at 320°F (160°C) for about 10-12 minutes. Keep an eye on them, as air fryers can vary. You’ll know they’re done when they’re golden brown around the edges!
- Cool before serving: Once they’re done, carefully remove the cookie cups from the air fryer (they’ll be hot!). Let them cool in the silicone cups for a few minutes before transferring them to a wire rack. This cooling time helps them firm up a bit, making them easier to handle.
And there you have it! Your Air-Fryer Chocolate Chip Cookie Cups are ready to be devoured. Enjoy them warm, or let them sit for a bit—if you can wait that long!
Nutritional Information
Here’s the estimated nutritional information for each delightful Air-Fryer Chocolate Chip Cookie Cup. Keep in mind that these values can vary based on the specific brands of ingredients you use and how big you make your cookie cups. But this should give you a good idea of what you’re enjoying!
- Calories: 200
- Fat: 10g
- Saturated Fat: 6g
- Unsaturated Fat: 4g
- Trans Fat: 0g
- Cholesterol: 30mg
- Sodium: 150mg
- Carbohydrates: 25g
- Fiber: 1g
- Protein: 2g
- Sugars: 12g
Enjoy these cookie cups in moderation, and savor every delicious bite! They’re perfect for a sweet treat without going overboard!
Why You’ll Love This Recipe
- Quick Preparation: You can have these Air-Fryer Chocolate Chip Cookie Cups ready in just about 27 minutes, including prep and cooking time! Perfect for those last-minute dessert cravings!
- Easy Clean-Up: Using silicone cups means less mess and easy removal. A quick rinse is all you need, making this a hassle-free baking experience!
- Delicious Flavor: The combination of buttery sweetness and rich chocolate makes every bite melt in your mouth. They’re just as satisfying as traditional cookies but with a fun twist!
- Vegetarian-Friendly: This recipe fits perfectly within a vegetarian diet, so everyone can enjoy these scrumptious treats!
- Customizable: Feel free to switch up the chocolate chips or add nuts—these cookie cups are versatile and can be tailored to your taste!
Tips for Success
Making perfect Air-Fryer Chocolate Chip Cookie Cups is a breeze, especially with these handy tips! Trust me, following these will elevate your cookie game and ensure that every batch turns out deliciously.
- Room Temperature Ingredients: Make sure your butter and egg are at room temperature. This helps them blend together smoothly, creating that light and fluffy texture we all love in cookies.
- Don’t Skip the Preheating: Preheating your air fryer is crucial! It helps the cookie cups cook evenly and achieve that perfect golden color. I can’t stress this enough—don’t skip it!
- Check for Doneness: Every air fryer is a bit different, so keep an eye on your cookie cups towards the end of the cooking time. They should be golden around the edges but still soft in the center. They’ll firm up as they cool, so don’t worry if they seem a little underbaked!
- Substitutions: If you’re out of brown sugar, you can substitute it with an equal amount of white sugar mixed with a tablespoon of molasses for a similar flavor. Alternatively, coconut sugar can work too, giving a lovely caramel note!
- Chocolate Choices: Experiment with different types of chocolate chips! Dark chocolate, semi-sweet, or even white chocolate can change the flavor profile and make these cookie cups even more delightful. You could even mix them up!
- Experiment with Mix-Ins: Feel free to add nuts, dried fruits, or even a sprinkle of sea salt on top before air frying for an extra flavor kick. These little tweaks can make your cookie cups unique every time you bake!
- Storage Tips: If you have leftovers (which is rare, trust me!), store them in an airtight container at room temperature for up to a week. You can also freeze them—just wrap them tightly and pop them in the freezer for up to a month!
With these tips in hand, you’re ready to create the most scrumptious Air-Fryer Chocolate Chip Cookie Cups that’ll have everyone asking for your recipe! Happy baking!
Variations of Air-Fryer Chocolate Chip Cookie Cups
One of the best things about these Air-Fryer Chocolate Chip Cookie Cups is how versatile they are! You can easily switch things up to suit your taste or even to use up what you have in your pantry. Here are some fun variations to consider:
- Nutty Delight: Add a handful of chopped nuts like walnuts or pecans for an extra crunch. Just fold them in along with the chocolate chips. It adds a fantastic texture and flavor!
- Double Chocolate: If you’re a chocolate lover like me, swap half of the all-purpose flour for cocoa powder. This will give you rich, chocolatey cookie cups that are totally indulgent!
- Peanut Butter Swirl: For a nutty twist, mix in a couple of tablespoons of creamy peanut butter into the batter. You can also drizzle some melted peanut butter on top before air frying for a delicious finishing touch.
- Oatmeal Chocolate Chip: Want to add some wholesome goodness? Stir in 1/2 cup of rolled oats for a chewy texture and a bit of fiber. They’ll still be just as delightful but with a heartier bite!
- White Chocolate and Cranberry: Swap out the chocolate chips for white chocolate chips and throw in some dried cranberries. This combination is perfect for a festive touch or when you want something a little different!
- Mint Chocolate Chip: If you love mint, add a few drops of peppermint extract to the batter and use mint chocolate chips instead. It’s a refreshing twist that’s perfect for the holidays!
- Spiced Cookie Cups: Add a pinch of cinnamon or nutmeg to the dry ingredients for a warm, spiced flavor. This is especially nice during the colder months when you want something cozy and comforting!
Feel free to mix and match these ideas! The beauty of baking is getting creative and making the recipe your own. No matter which variation you choose, I promise you’ll end up with delicious Air-Fryer Chocolate Chip Cookie Cups that everyone will love!
Storage & Reheating Instructions
Now that you’ve whipped up a batch of these delightful Air-Fryer Chocolate Chip Cookie Cups, you might be wondering how to keep them fresh for later. Here’s how to store any leftovers (if there are any, because they tend to disappear quickly!) and how to reheat them for that perfect warm, gooey experience.
Storing Your Cookie Cups: Let your cookie cups cool completely before storing them. This prevents any moisture from building up and keeps them from getting soggy. Once cooled, you can place them in an airtight container at room temperature for up to a week. If you want to keep them fresh even longer, you can freeze them!
Freezing Instructions: Wrap each cookie cup tightly in plastic wrap or place them in a freezer-safe bag. They’ll keep well in the freezer for up to a month. Just make sure to label them with the date so you know when they were made!
Reheating Tips: When you’re ready to enjoy your cookie cups again, simply take out as many as you want. If they’ve been frozen, let them thaw at room temperature for about 15-20 minutes. To reheat, pop them in your air fryer at 300°F (150°C) for about 3-5 minutes. This will warm them up perfectly and revive that delightful gooey center!
Alternatively, you can microwave them for about 10-15 seconds if you’re in a hurry. Just be careful not to overheat, or you’ll end up with a rubbery cookie instead of that soft, chewy goodness!
With these storage and reheating instructions, you can savor your Air-Fryer Chocolate Chip Cookie Cups whenever the craving strikes. Enjoy every last bite!
FAQ Section
Got questions about making these delightful Air-Fryer Chocolate Chip Cookie Cups? Don’t worry, I’ve got you covered! Here are some common queries I often hear, along with my answers to help you get the best results.
Q1: Can I make the dough ahead of time?
Absolutely! You can prepare the cookie dough in advance and store it in the refrigerator for up to 24 hours. Just make sure to cover it tightly. When you’re ready to bake, scoop the chilled dough into your silicone cups and air fry as directed. This can actually enhance the flavors!
Q2: What if I don’t have an air fryer?
No problem! You can bake these cookie cups in a conventional oven. Preheat your oven to 350°F (175°C) and place the filled silicone cups on a baking sheet. Bake for about 12-15 minutes, or until they’re golden brown. Just keep an eye on them towards the end!
Q3: Can I substitute the chocolate chips for something else?
Definitely! Feel free to swap chocolate chips for any mix-ins you love—like dried fruits, nuts, or even different types of chocolate. Just remember to adjust the amount based on your preference so that the cookie cups still hold their shape!
Q4: How do I know when my cookie cups are done?
You’ll know they’re done when they’re golden brown around the edges and slightly soft in the center. They’ll continue to firm up as they cool, so don’t worry if they seem a little underbaked when you first take them out!
Q5: Can I make these cookie cups gluten-free?
Yes, you can! Just swap the all-purpose flour for a good quality gluten-free flour blend. Make sure the blend you choose is suitable for baking, and your cookie cups will turn out just as delicious!
I hope these answers help! If you have more questions, feel free to reach out. Happy baking!
Print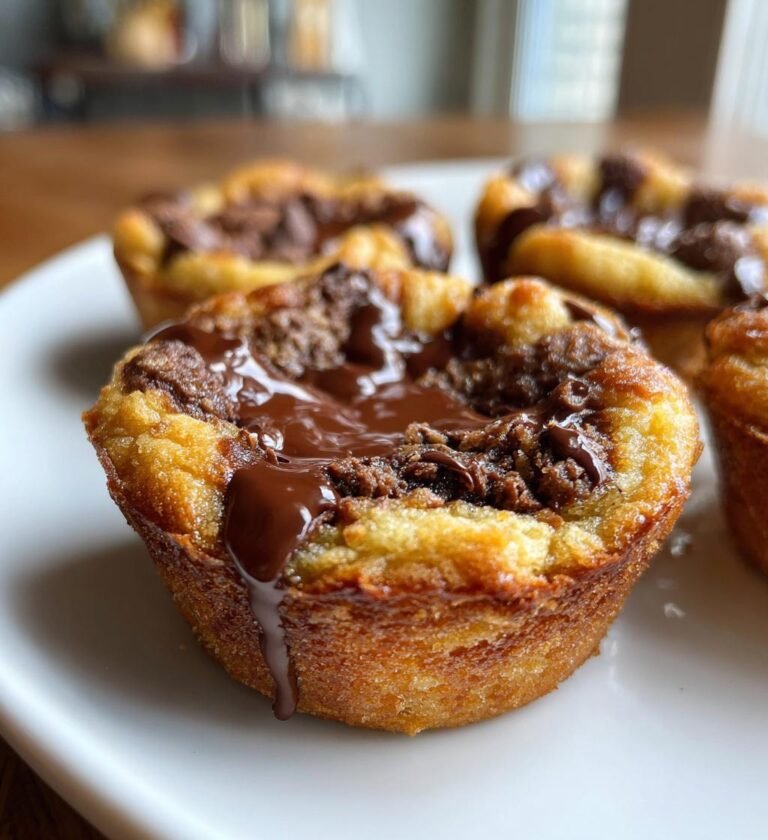
Air-Fryer Chocolate Chip Cookie Cups: 5 Sweet Wonders
Delicious air-fryer chocolate chip cookie cups that are easy to make.
- Total Time: 27 minutes
- Yield: 6 cookie cups 1x
Ingredients
- 1 cup all-purpose flour
- 1/2 teaspoon baking soda
- 1/4 teaspoon salt
- 1/2 cup unsalted butter, softened
- 1/2 cup brown sugar
- 1/4 cup granulated sugar
- 1 teaspoon vanilla extract
- 1 large egg
- 1 cup chocolate chips
Instructions
- Preheat your air fryer to 320°F (160°C).
- In a bowl, mix flour, baking soda, and salt.
- In another bowl, cream butter, brown sugar, and granulated sugar.
- Add vanilla extract and egg to the butter mixture and combine.
- Gradually add the dry ingredients to the wet mixture.
- Fold in chocolate chips.
- Scoop the dough into silicone cups or muffin liners.
- Place the cups in the air fryer basket and cook for 10-12 minutes.
- Let cool before serving.
Notes
- Use silicone cups for easy removal.
- Adjust cooking time based on your air fryer model.
- Store leftovers in an airtight container.
- Prep Time: 15 minutes
- Cook Time: 12 minutes
- Category: Dessert
- Method: Air Frying
- Cuisine: American
- Diet: Vegetarian
Nutrition
- Serving Size: 1 cookie cup
- Calories: 200
- Sugar: 12g
- Sodium: 150mg
- Fat: 10g
- Saturated Fat: 6g
- Unsaturated Fat: 4g
- Trans Fat: 0g
- Carbohydrates: 25g
- Fiber: 1g
- Protein: 2g
- Cholesterol: 30mg
Keywords: Air-Fryer Chocolate Chip Cookie Cups